Welcome to FullStack. We use cookies to enable better features on our website. Cookies help us tailor content to your interests and locations and provide many other benefits of the site. For more information, please see our Cookies Policy and Privacy Policy.
From reading barcodes to adding multimedia or AR capabilities, the phone camera is very useful in a multitude of scenarios. So how can we tap these capabilities in a React Native app? A great option is by using a community package called React Native Camera.
Getting Started
We are going to start by creating a new React Native project, let's call it AwesomeCamera!
npx react-native init AwesomeCamera
cd AwesomeCamera
npx react-native run-android # or run-ios
Now that we have a clean project to start working on, we need to install a couple of packages to get things going! First, the previously mentioned React Native Camera and a Vector Icon library to get a nice camera icon for our app.
npm install --save react-native-vector-icons react-native-camera
cd ios && pod install && cd ..
npx react-native link react-native-vector-icons
And we need to set up permissions for both Android and iOS. In the case of Android, we need to go to the android/app/src/main/AndroidManifest.xml file and add
/* Required *
<uses-permission android:name="android.permission.CAMERA"></uses-permission>
/* Include this only if you are planning to use the microphone for video recording */

<uses-permission android:name="android.permission.RECORD_AUDIO"></uses-permission>
/* Include this only if you are planning to use the camera roll */

<uses-permission android:name="android.permission.READ_EXTERNAL_STORAGE"></uses-permission>
<uses-permission android:name="android.permission.WRITE_EXTERNAL_STORAGE"></uses-permission>
And we also need to include a few lines at android/app/build.gradle
android {
 ...
 defaultConfig {
  ...
  missingDimensionStrategy 'react-native-camera', 'general' /* insert this line */
 }
}
In the case of iOS we just need to edit ios/AwesomeCamera/Info.plist and add inside <dict></dict>
/* Required with iOS 10 and higher */

<key>NSCameraUsageDescription</key><string>Your message to user when the camera is accessed for the first time</string>
/* Required with iOS 11 and higher: include this only if you are planning to use the camera roll */

<key>NSPhotoLibraryAddUsageDescription</key><string>Your message to user when the photo library is accessed for the first time</string>
/* Include this only if you are planning to use the camera roll */

<key>NSPhotoLibraryUsageDescription</key><string>Your message to user when the photo library is accessed for the first time</string>
/* Include this only if you are planning to use the microphone for video recording */

<key>NSMicrophoneUsageDescription</key><string>Your message to user when the microphone is accessed for the first time</string>
For our current example, we just need access to the camera so no microphone or photo library access is required. Let’s start with the Camera component. On the components/Camera.js we’ll have
import React, {PureComponent} from 'react';import {RNCamera} from 'react-native-camera';
export default class Camera extends PureComponent {  constructor(props) {
  super(props);}
render() {
  return (
    <RNCamera
      ref={ref => {
        this.camera = ref;
      }}
      captureAudio={false}
      style={{flex: 1}}
      type={RNCamera.Constants.Type.back}
      androidCameraPermissionOptions={{
        title: 'Permission to use camera',
        message: 'We need your permission to use your camera',
        buttonPositive: 'Ok',
        buttonNegative: 'Cancel',
      }} />
    );
  }}
To clarify what we have here let's look prop by prop.
Lets us decide which camera to use, if front or back
androidCameraPermissionOptions={{
title: 'Permission to use camera',
message: 'We need your permission to use your camera',
buttonPositive: 'Ok',
buttonNegative: 'Cancel',
}}
Allows us to config the permissions message on android.
captureAudio={false}
Because we don't need to record audio for this example we set this option so a permission message doesn't pop up.
style={{flex: 1}}
We ask the camera to cover the container space. Now we are going to replace the App.js content with
import React from 'react';import Camera from './components/Camera';import {SafeAreaView} from 'react-native';
const App = () => {
return (
<
<SafeAreaView styles={{flex:1}}
<Camera /
</SafeAreaView
</>
);};
export default App;
And now we have our camera working! You should get a prompt to request permissions in your device or emulator and then get access to the camera.
Using your webcam as the camera of your emulator
The Android emulator comes with a nice feature that allows developers to use your laptop's webcam as the emulated device camera. To configure this we need to open Android Studio and search for the AVD Manager. We need to click on the pencil icon for the device we are emulating and that opens the Virtual Device Configuration screen. Then click on the Show Advanced Settings and the Camera option is now available for edition. It has two options Front and Back to decide which camera we are going to use, so click on the dropdown for the Back camera and select the Webcam0 option and then Finish. If you have the emulator running, you should restart it to apply the configuration. Unfortunately for the iOS simulator there is no similar option that I'm aware of, so you need to test things in a real device.
Taking a picture
Now that we have access to the camera, it is time to take a picture! So we are going to add a button to get the picture when pressed. Our components/Camera.js is going to look something like this
import React, {PureComponent} from 'react';import {RNCamera} from 'react-native-camera';
import Icon from 'react-native-vector-icons/dist/FontAwesome';import {TouchableOpacity, Alert, StyleSheet} from 'react-native';
export default class Camera extends PureComponent
constructor(props) {
super(props);
this.state = {
takingPic: false,
};
}
takePicture = async () => {
if (this.camera && !this.state.takingPic) {
let options = {
quality: 0.85,
fixOrientation: true,
forceUpOrientation: true,
};
this.setState({takingPic: true});
try {
const data = await this.camera.takePictureAsync(options);
Alert.alert('Success', JSON.stringify(data));
} catch (err) {
Alert.alert('Error', 'Failed to take picture: ' + (err.message || err));
return;
} finally {
this.setState({takingPic: false});
}
}
};
render() {
return (
ref={ref => {
  this.camera = ref;
}}
captureAudio={false}
style={{flex: 1}}
type={RNCamera.Constants.Type.back}
androidCameraPermissionOptions={{
            title: 'Permission to use camera',
            message: 'We need your permission to use your camera',
            buttonPositive: 'Ok',
            buttonNegative: 'Cancel',
}}>
activeOpacity={0.5}
style={styles.btnAlignment}
onPress={this.takePicture}>
<icon name="camera" size="{50}" color="#fff"></icon>
);
}}
const styles = StyleSheet.create({
btnAlignment: {
flex: 1,
flexDirection: 'column',
justifyContent: 'flex-end',
alignItems: 'center',
marginBottom: 20,
},
});
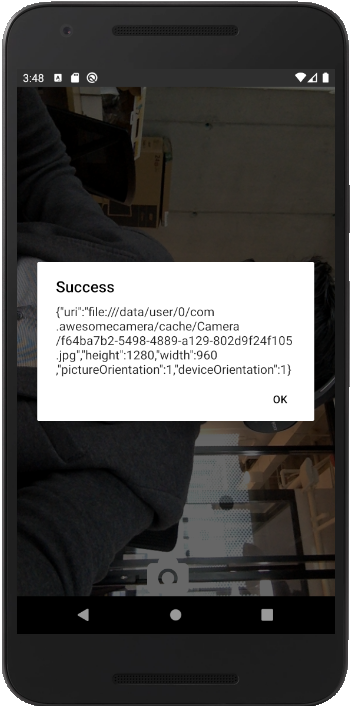
While we added quite a few things here, the truth is we just need to focus on the takePicture async function that is called when pressing the camera icon. This function checks that we have a ref for our RNCamera component and that no picture is being processed currently. Next, it calls the takePictureAsync function that the RNCamera object gives us and once the picture is taken, returns an object with the photo info.
Accessing the picture
As we can see from the screenshot, inside the object we have an uri property with the direction of the file – let’s put it to use. In our App.js file, we are going to have the following
The onPicture function gets a data object and destructures it to find the uri and store it as part of the component state; we are using that uri to access the file and show it using the Image component. Now if we have an image the camera will go away, and if we tap the image the camera will come back!
Face Recognition in iOS
Add the FaceDetectorMLKit kit to the Podfile to enable face recognition in the React Native Camera package on iOS.
/* ios/Podfile */...
pod 'react-native-camera', path: '../node_modules/react-native-camera', subspecs: [
  'FaceDetectorMLKit']
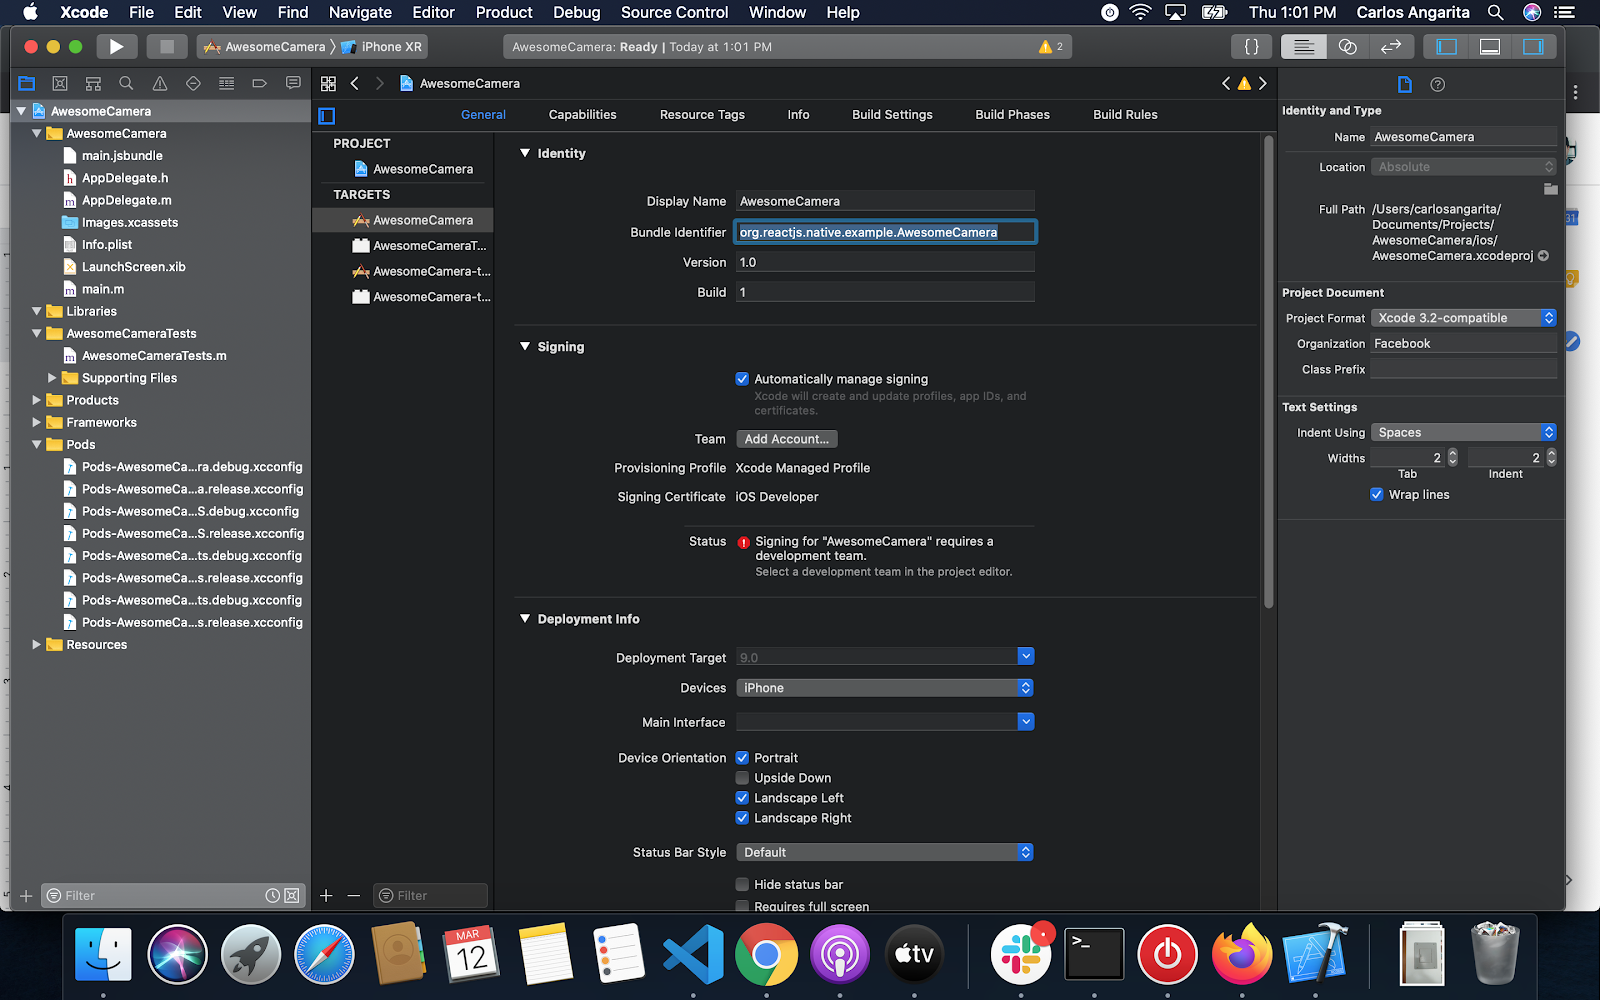
To use the MLKit we need to create and login to a Firebase account and create a new project. Click on the iOS icon and it will ask for the iOS bundle id. First, open AwesomeCamera.xcodeproj in Xcode by selecting the project name in the sidebar. Then, click on the general tab to show the bundle identifier.
Back to Firebase, we paste the bundle id – if you read my previous post it will be something like org.reactjs.native.example.AwesomeCamera. When we click next, we can download the GoogleService-Info.plist file; place it in the ios folder. In Xcode we need to right-click on the AwesomeCamera folder, click on Add files to AwesomeCamera, and select the GoogleService-Info.plist file.
Then in the Podfile and AppDelegate.m we add
/* ios/Podfile */...
pod 'Firebase/Core'

/* ios/AwesomeCamera/AppDelegate.m */
#import <firebase.h> /* add this */</firebase.h>...- (BOOL)application:(UIApplication *)application didFinishLaunchingWithOptions:(NSDictionary *)launchOptions
 {

  [FIRApp configure]; /* add this */
   ...
 }
Then cd ios && pod install && cd ..
Troubleshooting iOS
If the following error message appears when you try to run the project
error: Cycle inside AwesomeCameraTests; building could produce unreliable results.
Cycle details:
→ Target 'AwesomeCameraTests' has target dependency on Target 'AwesomeCamera'
○ That command depends on command in Target 'AwesomeCamera': script phase "[CP] Copy Pods Resources"

** BUILD FAILED **
Run
npx react-native unlink react-native-vector-icons
Then, add the following to Podfile:
/* ios/Podfile... */
pod 'RNVectorIcons', :path => '../node_modules/react-native-vector-icons'
We also need to login to the Firebase console and create a new project, but we can also reuse the same project created for the Face Recognition in iOS section. Click on the Android icon and when it requests the application id, paste the one under android/app/build.gradle – in our case is com.awesomecamera. Then, we download the google-service.json file and place it in the android/app folder. In android/build.gradle we add
/* android/build.gradle */
buildscript {
...
dependencies {
...
/* Add this line */
classpath 'com.google.gms:google-services:4.3.3' /* you might want to use different version */
}
}
Then, back in android/app/build.gradleat the bottom of the file we add
We have a few new things in this component. First, we’ll be using the front camera to detect faces; we also added a box property to the state; and finally, we added the onFaceDetected prop to RNCamera
TheonFaceDetected function will check if a face was found and save the position and size of the box as well as the angles of the face in the box state object. Now, we are going to use these positions to create a simple effect that tracks the face and shows a random image on top of the head.
First, we load an array of images, in this case, I’m using the logos of some of the tech we use here at FullStack Labs. Then, when the component mounts, we show a random logo 50 times for around 0.1 seconds or until the component is unmounted. We use props to position the image on top of the head and the angles to transform it, so when a person turns their head, the image will follow.
In our Camera component, we will pass the box object as props to FSLTechFilter. In case no face is detected, we show nothing.
The MLKit also allows us to use landmarks for things like the right and left eye, ears, cheeks, or mouth. We will use these landmarks to make a filter that puts glasses on a face. First, on RNCamera add the faceDetectionLandmarks prop to active landmarks.
Now, when a face is detected, we get the landmark position. For this example, we are going to save the leftEyePosition and the rightEyePosition to state.
We take the left and right eye positions from the Face object (you can check the complete API here). Now, we need to create a new component to use these positions.
Most of the “magic” happens with the styles. Since the width of the glasses should grow if the face gets close to the screen, we take the distance between points in the X axis as reference for the size. We then start positioning the glasses a little on the side of the right eye so it will cover the eye fully. We also make the height fit automatically using resizeMode. Finally, we add some rotation based on the face angles.
Now we just need to add the filter to the Camera component
And that’s it! You can check the final result in the gif and the source code here.
Thank you for reading. I hope it has been helpful as an introduction to the React Native Camera package. This component is very powerful and can handle things like making videos, reading barcodes, and even doing face and text recognition. Hopefully, this tutorial will help you add more value to your app!
Using techniques like what is listed above, we have had the opportunity to address our clients’ concerns and they love it! If you are interested in joining our team, please visit our Careers page.