
%20with%20Flutter.webp)
What's Progressive Web App (PWA)?
PWA was coined in 2015 by the designer Frances Berriman and Alex Russell to describe Web Applications that take advantage of the new features of modern Web Browsers. A PWA can be opened as any web application can with a browser, but it can also be downloaded as a regular desktop App.
The main core components that ensure that PWA works flawlessly are Service Workers. These components are a kind of network proxy that takes control of a network request from the application and adds cache capabilities, background app sync, push notifications, and offline features.
Nonetheless, there are some disadvantages when we build PWAs.
- There's no central repository, store, or structured approval process for the PWA Apps.
- PWA can't communicate with other apps, so, for example, if we need to make a Cross-Application Login (Facebook, Google), we need to make it manually.
- There are limitations related to the access of hardware components on devices.
- PWA depends on the support of the web browser, although most of the browsers provide good support, older browsers like IE11 have limited support for PWA.
Flutter 2 and PWA
On March 3, 2021, Google announced their support for PWAs on the Flutter Stable channel, bringing a lot of possibilities with the Flutter framework environment to create interactive experiences on the web, and to save development time using the same code base to build mobile apps for iOS and Android.
Even though PWAs with Flutter offer a great combination, not all web applications are ideal to build with Flutter. PWA with Flutter lacks search indexing capabilities --- for example, static content such as landing pages or blog articles are not suitable to build on Flutter because that content won't be indexed on Search Engines.
Some other considerations to evaluate when building PWAs:
- Although PWAs with Flutter are available on a stable channel, there are still issues if we use dependencies or libraries that actually aren’t supported for the web.
- If you are already using Plugins in your Flutter application and planning to port to the web, you need to make sure that those plugins have web support. Some of them don’t have support for PWAs --- for example, some network caching plugins that you're probably using for mobile apps need to be reimplemented manually.
- SEO support for Flutter is still a work in progress, although there’s a plugin called SEO rendered (https://pub.dev/packages/seo_renderer) that could be useful to handle this limitation.
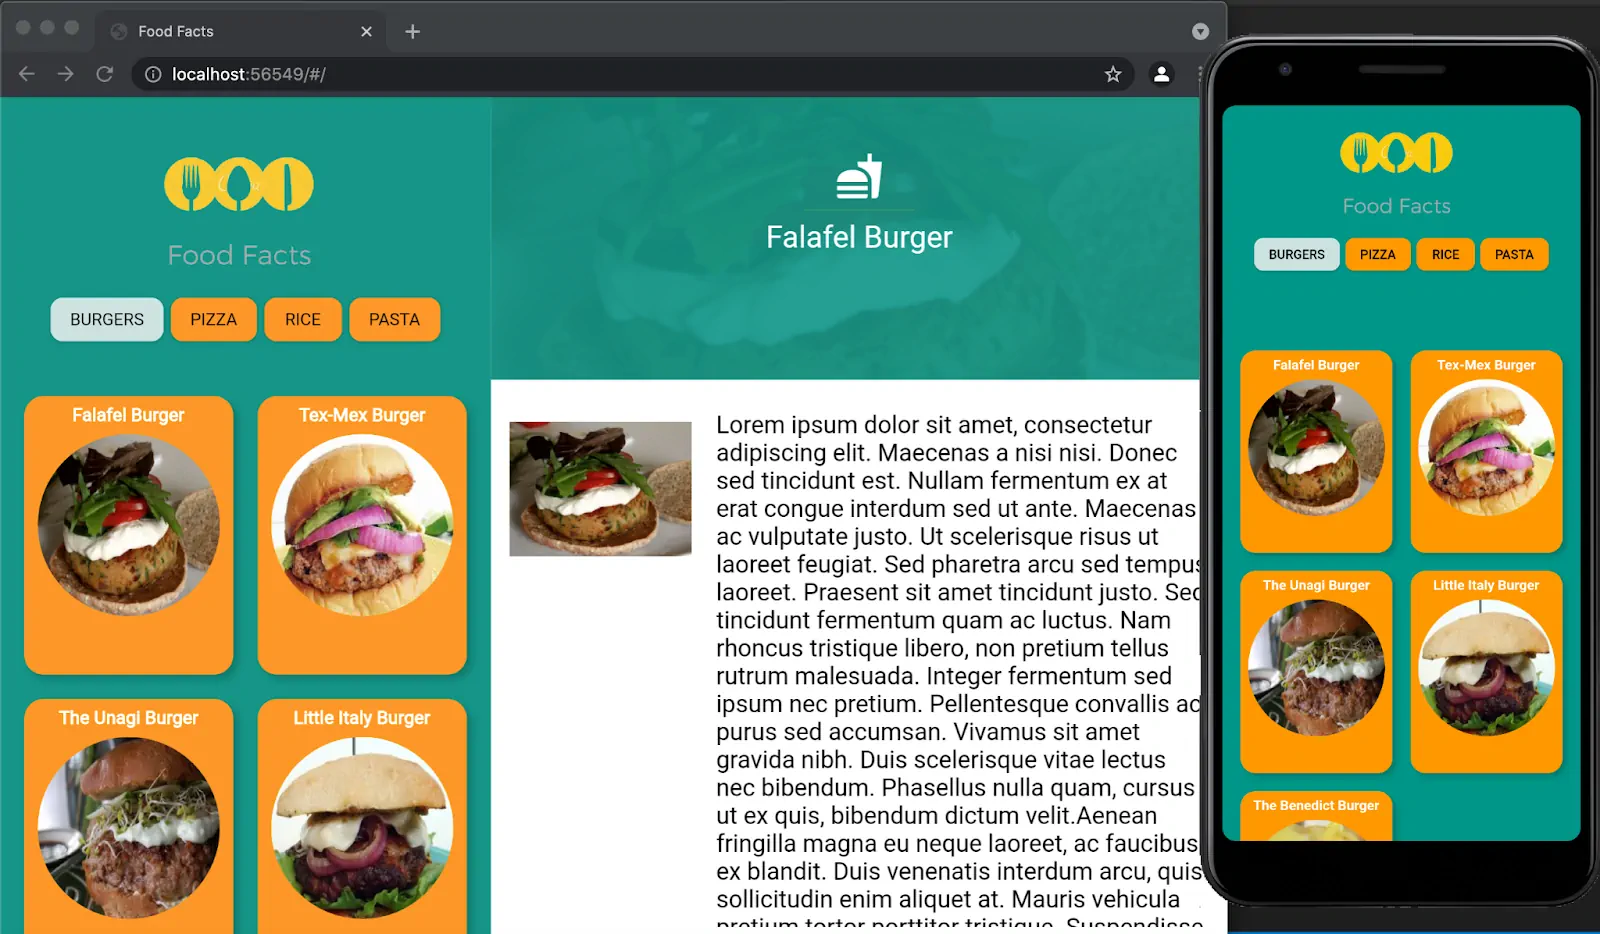
Demo Application
You can review Fullstack Labs’s demo application (FoodFacts). This application works both for mobile devices as well as PWA web applications. With this Flutter application, you can check out some of the main considerations to build PWA applications.
Here’s the GitHub repository: https://github.com/fullstacklabs/flutter-food-facts
Considerations to build or adapt PWA with Flutter
There are some considerations that we need to address in order to create or adapt an existing Flutter application to PWA:
Not all the big screens are touch
Let’s consider an example: iPad and tablets have considerably larger screens than a smartphone, but still have touch capabilities. On the other hand, we can have a big screen size on a desktop or laptop computer, and when we create a PWA with Flutter we need to consider the following points:
- To find out if our app is running as a PWA application we can use the kIsWeb variable (this variable is initialized on the run time).
- We can find out the size of the screen with the MediaQuery class, but we need to check the screen orientation (portrait or landscape).
- You can leverage getting the size of the screen on the LayoutBuilder widget, this widget allows us to get the maxWidth and maxHeight of the device so we can adapt the application on the device size:
The Web and Desktop support Keyboard and Mouse events
Even though some desktop devices have touch monitors we need to consider that it’s a minority, so we need to adapt not only the content based on the screen size but also the human interaction. On the web the most common input devices are the keyboard and mouse, so we need to take into account this fact when we create or adapt our content. Here are some points:
- Identify the elements or widgets that are touchable (generate events like push another page or trigger an action).
- On those widgets, we need to wrap it up with the MouseRegion widget, like the following code.
.gif)
In the case of desktop or web applications, some advanced users use keyboard shortcuts. On Flutter Applications, we need to take special cautions with how the users interact with the keyboard inside some widgets.
- The RawKeyboardListener is a class that handles keyboard strokes. We can leverage this to perform shortcuts navigation.
- Widgets have the handleKeyDown method. We can override this method on our widgets to trigger actions inside our content if the keyboard is available. Here’s an example:
Scrollbars
Usually, on mobile apps, you don’t need scrollbars that point out the location of an item or part of the screen, but when it comes to web or desktop, the scrollbars act as a fundamental part to show the location of a list item regarding the remaining content. That’s why we need to use the Scrollbar widget to actually show this component on desktop and web devices.
.gif)
Plugins
Although Flutter devs are porting their plugins to support the web everyday, there are still plenty of useful plugins that do not support PWAs. For example, if you want to use Caching Network images for your web application, you have to implement your own caching mechanism manually. Here’s an example:
You need to store the result of the network operation in your inner data structure in your Flutter code for later so you can check the presence of the element in your structure afterward:
Conclusion
Building a PWA with Flutter allows us to have a single code base for virtually all the main platforms available today, but we have to recognize some of the drawbacks and limitations of the platform. If you are working on a simple PWA without SEO indexing and have the same codebase for mobile applications, Flutter is a great platform to build a PWA.