Learn more about our current job openings and benefits of working at FSL.
Detailed reviews and feedback from past and current clients.
Get to know the Management Team behind FullStack Labs.
Our step-by-step process for designing and developing new applications.
Writings from our team on technology, design, and business.
Get answers to the questions most frequently asked by new clients.
Learn about our company culture and defining principles.
A high level overview of FullStack Labs, who we are, and what we do.
A JavaScript framework that allows rapid development of native Android and IOS apps.
A JavaScript framework maintained by Facebook that's ideal for building complex, modern user interfaces within single page web apps.
A server side programming language known for its ease of use and speed of development.
A lightweight and efficient backend javascript framework for web apps.
An interpreted high-level programming language great for general purpose programming.
A JavaScript framework maintained by Google that addresses many of the challenges encountered when building single-page apps.
A JavaScript framework that allows developers to build large, complex, scalable single-page web applications.
A progressive JavaScript framework known for its approachability, versatility, and performance.
View a sampling of our work implemented using a variety of our favorite technologies.
View examples of the process we use to build custom software solutions for our clients.
View projects implemented using this javascript framework ideal for building complex, modern user interfaces within single page web apps.
View projects implemented using this framework that allows rapid development of native Android and IOS apps.
View projects implemented using this backend javascript framework for web apps.
View projects implemented using this high-level programming language great for general purpose programming.
View projects implemented using this server side programming language known for its ease of use and speed of development.
We have vast experience crafting healthcare software development solutions, including UI/UX Design, Application Development, Legacy Healthcare Systems, and Team Augmentation. Our development services help the healthcare industry by enhancing accessibility, productivity, portability, and scalability.
We offer a range of custom software development solutions for education companies of all sizes. We're experts in Education Software Development and specialists in enhancing the learning experience across web, mobile, and conversational UI.
We're experts in developing Custom Software Solutions for the Logistics Industry. Our work offered a whole new and more efficient way for Logistics companies to manage their crucial operations.
We partner with various construction industry organizations to build custom software development solutions. Our Construction Software Development Services allow construction companies to manage projects, resources, and documentation.
Learn more about our current job openings and benefits of working at FSL.
Detailed reviews and feedback from past and current clients.
Get to know the Management Team behind FullStack Labs.
Our step-by-step process for designing and developing new applications.
Writings from our team on technology, design, and business.
Get answers to the questions most frequently asked by new clients.
Learn about our company culture and defining principles.
A high level overview of FullStack Labs, who we are, and what we do.
A JavaScript framework that allows rapid development of native Android and IOS apps.
A JavaScript framework maintained by Facebook that's ideal for building complex, modern user interfaces within single page web apps.
A server side programming language known for its ease of use and speed of development.
A lightweight and efficient backend javascript framework for web apps.
An interpreted high-level programming language great for general purpose programming.
A JavaScript framework maintained by Google that addresses many of the challenges encountered when building single-page apps.
A JavaScript framework that allows developers to build large, complex, scalable single-page web applications.
A progressive JavaScript framework known for its approachability, versatility, and performance.
A dynamic programming language used in all sorts of web and mobile applications.
A cross-platform programming language designed to run robust applications on any device.
A UI toolkit used to build natively compiled applications from a single codebase.
A functional programming language that’s ideal for scalability, maintainability, and reliability.
A Customer Relationship Management (CRM) platform that seamlessly integrates with your business operations.
A high-performance programming language that makes it easy to build simple, reliable, and efficient software.
View a sampling of our work implemented using a variety of our favorite technologies.
View examples of the process we use to build custom software solutions for our clients.
View projects implemented using this javascript framework ideal for building complex, modern user interfaces within single page web apps.
View projects implemented using this framework that allows rapid development of native Android and IOS apps.
View projects implemented using this backend javascript framework for web apps.
View projects implemented using this high-level programming language great for general purpose programming.
View projects implemented using this server side programming language known for its ease of use and speed of development.
Creating new applications using React and Node.js always requires a certain amount of work before you actually start working on the final solution. In this tutorial you will find everything you need to start from scratch.
Develop a Chat Application Using React, Express and Socket.IO
*Note: Prior to starting working with this tutorial you must have at least Node.js 10 or higher installed on your machine. You can find the installation guide here
First, we're going to use Express as the API that will handle every request made by the front-end:
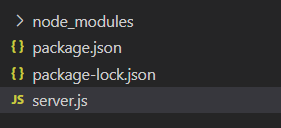
Now that we have installed our core library we can proceed to create the Node file that will execute all the logic of our application. Create a server.js File in the root directory of your back-end project:
Inside server.js place the following code:
-- CODE language-jsx keep-markup --
var app = require('express')();
var http = require('http').createServer(app);
const PORT = 8080;
http.listen(PORT, () => {
console.log(`listening on *:${PORT}`);
});
Now that you have placed the code inside server.js, let’s quickly make sure everything is working by running the following command:
-- CODE language-bash keep-markup --
node server.js
If everything is in order, the message “listening on *:8080” should appear in the console.
Now we can proceed to install the library which can handle the web sockets connections:
-- CODE language-bash keep-markup --
npm i --save socket.io
Let’s create our first socket listener in the server.js file:
-- CODE language-jsx keep-markup --
var app = require('express')();
var http = require('http').createServer(app);
const PORT = 8080;
var io = require('socket.io')(http);
http.listen(PORT, () => {
console.log(`listening on *:${PORT}`);
});
io.on('connection', (socket) => { /* socket object may be used to send specific messages to the new connected client */
console.log('new client connected');
});
The first step to create the front end of our applications will be to initialize the React application. You can easily do this with the command:
-- CODE language-bash keep-markup --
npx create-react-app my-app
Now that the code base is initialized, we can proceed to install the Socket.IO library for our front end. Just use the client library of socket.io with:
-- CODE language-bash keep-markup --
npm i socket.io-client
If this is your first time using Socket.IO, this part will be exciting since we are enabling real-time communication between a single client and our back end using web sockets. In the ~/App.js include the Socket.IO client and create a variable to store the socket object like this:
-- CODE language-jsx keep-markup --
import React from 'react';
import logo from './logo.svg';
import './App.scss';
import socketClient from "socket.io-client";
const SERVER = "http://127.0.0.1:8080";
function App() {
var socket = socketClient (SERVER);
return (
<div classname="App"></div>
<header classname="App-header"></header>
<img src="{logo}" classname="App-logo" alt="logo">
<p></p>
Edit <code>src/App.js</code> and save to reload.
<p></p>
className="App-link"
href="https://reactjs.org"
target="_blank"
rel="noopener noreferrer"
>
Learn React
);
}
export default App;
Now that we have our socket variable, we can start listening to events emitted by our back end. In order to be notified when the client is connected we have to tweak our previous code in the server.js file:
-- CODE language-jsx keep-markup --
var app = require('express')();
var http = require('http').createServer(app);
const PORT = 8080;
var io = require('socket.io')(http);
const STATIC_CHANNELS = ['global_notifications', 'global_chat'];
http.listen(PORT, () => {
console.log(`listening on *:${PORT}`);
});
io.on('connection', (socket) => { /* socket object may be used to send specific messages to the new connected client */
console.log('new client connected');
socket.emit('connection', null);
});
With the socket.emit function, custom events can be sent from the back end to the front end through the newly established socket connection. This method will only send messages between the specific client that was recently connected. Sending messages to all the clients connected will be explained later.
In order to receive those notifications from the back end, we need to listen for the events created there. For example, we are emitting the connection event to the client as soon it opens a new connection, so we have to put the same label in our front to execute some code when this happens:
-- CODE language-jsx keep-markup --
var socket = socketClient (SERVER);
socket.on('connection', () => {
console.log(`I'm connected with the back-end`);
});
In the browser it should look like this:
With the installation complete, we can focus on building the UI of our application and the logic behind it.
In order to create a standalone components, we have to create a folder called “chat” with the following structure:
-- CODE language-jsx keep-markup --
import React from 'react';
import { ChannelList } from './ChannelList';
import './chat.scss';
export class Chat extends React.Component {
state = {
channels: [{ id: 1, name: 'first', participants: 10 }]
}
render() {
return (
<div classname="chat-app"></div>
<channellist channels="{this.state.channels}"></channellist>
);
}
}
-- CODE language-jsx keep-markup --
import React from 'react';
import { Channel } from './Channel';
export class ChannelList extends React.Component {
render() {
let list = `There is no channels to show`;
if (this.props.channels) {
list = this.props.channels.map(c => <channel key="{c.id}" id="{c.id}" name="{c.name}" participants="{c.participants}">);</channel>
}
return (
<div classname="channel-list"></div>
{list}
);
}
}
-- CODE language-jsx keep-markup --
import React from 'react';
export class Channel extends React.Component {
render() {
return (
<div classname="channel-item"></div>
<div>{this.props.name}</div>
<span>{this.props.participants}</span>
)
}
}
-- CODE language-scss keep-markup --
.chat-app {
width: 100%;
height: 100%;
display: flex;
.channel-list {
width: 20%;
border: 1px solid rgb(224, 224, 224);
margin: 10px;
height: calc(100% - 22px);
}
.channel-item {
border-bottom: 1px solid rgb(224, 224, 224);
padding: 10px;
div {
font-weight: bold;
}
span {
font-size: 10px;
}
&:hover {
background-color: rgb(224, 224, 224);
}
}
}
To see the chat as a full window component, you might want to stylize the root element to fill the whole screen. To do so, you will have to modify the index.css file and add this:
-- CODE language-css keep-markup --
html, body {
margin: 0;
height: 100%;
}
#root {
width: 100%;
height: 100%;
}
At this point the application should look something like this
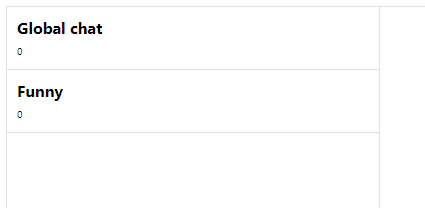
Now that we have an interface structure, we might want to define the messages panel. For this, we have to create a new component called MessagesPane.js and Message.js.
-- CODE language-jsx keep-markup --
import React from 'react';
export class Message extends React.Component {
render() {
return (
<div classname="message-item"></div>
<div><b>{this.props.senderName}</b></div>
<span>{this.props.text}</span>
)
}
}
-- CODE language-jsx keep-markup --
import React from 'react';
import { Message } from './Message';
export class MessagesPanel extends React.Component {
render() {
let list = <div classname="no-content-message">There is no messages to show</div>;
if (this.props.channel && this.props.channel.messages) {
list = this.props.channel.messages.map(m => <message key="{m.id}" id="{m.id}" sendername="{m.senderName}" text="{m.text}">);</message>
}
return (
<div classname="messages-panel"></div>
<div classname="meesages-list">{list}</div>
<div classname="messages-input"></div>
<input type="text">
<button>Send</button>
);
}
}
In order to adjust the styles of the application, we have to make some changes to our chat.scss file. It should look like this:
-- CODE language-scss keep-markup --
.chat-app {
width: 100%;
height: 100%;
display: flex;
.no-content-message {
color: #cccccc;
font-style: italic;
font-size: 20px;
text-align: center;
margin: 20px;
}
.channel-list {
width: calc(20% - 12px);
border: 1px solid rgb(224, 224, 224);
margin: 10px;
margin-right: 0;
border-right: none;
height: calc(100% - 22px);
}
.channel-item {
border-bottom: 1px solid rgb(224, 224, 224);
padding: 10px;
div {
font-weight: bold;
}
span {
font-size: 10px;
}
&:hover {
background-color: rgb(224, 224, 224);
cursor: pointer;
}
}
.messages-panel {
width: calc(80% - 12px);
border: 1px solid rgb(224, 224, 224);
margin: 10px;
margin-left: 0;
height: calc(100% - 22px);
display: flex;
flex-direction: column;
align-items: flex-start;
.meesages-list {
align-self: stretch;
height: 100%;
}
.messages-input {
width: 100%;
height: 40px;
border-top: 1px solid rgb(224, 224, 224);
background-color: #f0f0f0;
display: flex;
input {
margin: auto;
height: 20px;
width: 100%;
margin-left: 15px;
border-radius: 15px;
border: 1px solid rgb(224, 224, 224);
&:focus {
border-radius: 15px;
border: 2px solid #66a6ff;
outline: none;
}
}
button {
width: 60px;
margin: auto 10px;
background-color: #0e62da;
color: white;
border: 1px solid;
border-radius: 10px;
padding: 5px 13px;
&:hover {
cursor: pointer;
background-color: #66a6ff;
}
}
}
}
}
After these changes are made, we need to introduce the new panel into the Chat.js file:
The interface has its basic form. Now it’s time to start developing some logic to send and receive messages.
We need to retrieve the current channel's information. For this, we have to fetch this from the back end. In server.js, we can add:
-- CODE language-jsx keep-markup --
app.get('/getChannels', (req, res) => {
res.json({
channels: STATIC_CHANNELS
})
});
For the front, modify the Chat.js file and add this function:
-- CODE language-jsx keep-markup --
componentDidMount() {
this.loadChannels();
}
loadChannels = async () => {
fetch('http://localhost:8080/getChannels').then(async response => {
let data = await response.json();
this.setState({ channels: data.channels });
})
}
With the code above the information for the channels should be displayed in the application like this:
You are now connected with the back end via websocket and http. For real time communication, we have to define some listeners and emit some events in order to update the information of every channel. Selecting a channel should trigger an event that the back end will handle.
The front end needs to handle these events as well. To capture the events we have to use the same event name that the back end emits and vice versa. When the client hits the channel, an event must be sent to the back end to calculate the number of participants and broadcast to all the current sockets that a new user entered the channel.
-- CODE language-jsx keep-markup --
handleChannelSelect = id => {
this.socket.emit('channel-join', id, ack => {
});
}
render() {
return (
<div classname="chat-app"></div>
<channellist channels="{this.state.channels}" onselectchannel="{this.handleChannelSelect}"></channellist>
<messagespanel></messagespanel>
);
}
With this logic implemented, the application now captures the events emitted from the client and the server.
It’s time to start sending some specific messages over the websocket. To accomplish this, we have to capture the information in our textbox and then submit it by clicking the send button. When the click event is captured, we have to make sure that we can send all the information related to the message. In this case the information will be:
-- CODE language-jsx keep-markup --
configureSocket = () => {
var socket = socketClient(SERVER);
socket.on('connection', () => {
if (this.state.channel) {
this.handleChannelSelect(this.state.channel.id);
}
});
socket.on('channel', channel => {
let channels = this.state.channels;
channels.forEach(c => {
if (c.id === channel.id) {
c.participants = channel.participants;
}
});
this.setState({ channels });
});
socket.on('message', message => {
let channels = this.state.channels
channels.forEach(c => {
if (c.id === message.channel_id) {
if (!c.messages) {
c.messages = [message];
} else {
c.messages.push(message);
}
}
});
this.setState({ channels });
});
this.socket = socket;
}
handleSendMessage = (channel_id, text) => {
this.socket.emit('send-message', { channel_id, text, senderName: this.socket.id, id: Date.now() });
}
render() {
return (
<div classname="chat-app"></div>
<channellist channels="{this.state.channels}" onselectchannel="{this.handleChannelSelect}"></channellist>
<messagespanel onsendmessage="{this.handleSendMessage}" channel="{this.state.channel}"></messagespanel>
);
}
For the back the integration is simple, as we only have to broadcast the messages received.
-- CODE language-jsx keep-markup --
socket.on('send-message', message => {
io.emit('message', message);
});
The final result should look like this:
The full code can be found here:
Here at FullStack Labs, our UI/UX designers, React developers, and Node.js developers all follow a playbook and apply coding best practices such as those found here. The previous guide was intended only to explain a simple way to communicate between the front end and the back end of a single application and makes no claim as to best practices around React nor Node development.
We’d love to learn more about your project.
Engagements start at $75,000.